Paperflow™ allows you to export images and/or index information into a format compatible with a number of imaging systems, including ApplicationXtender. ApplicationXtender is an Enterprise Content Management solution that electronically stores, organizes, and manages virtually any kind of business content. The following document will show you how to export images and information into ApplicationXtender.
Getting Started
This process will require Paperflow R82. This export process does not apply for earlier versions.
Export Setup
- Open Paperflow™ .
- Select the job to setup Export Settings on.
- Click the “Auto Process” tab, followed by the “Wizard” button (indicated by a picture of a hand holding a wand)
- Select “OTG Record Out” option.
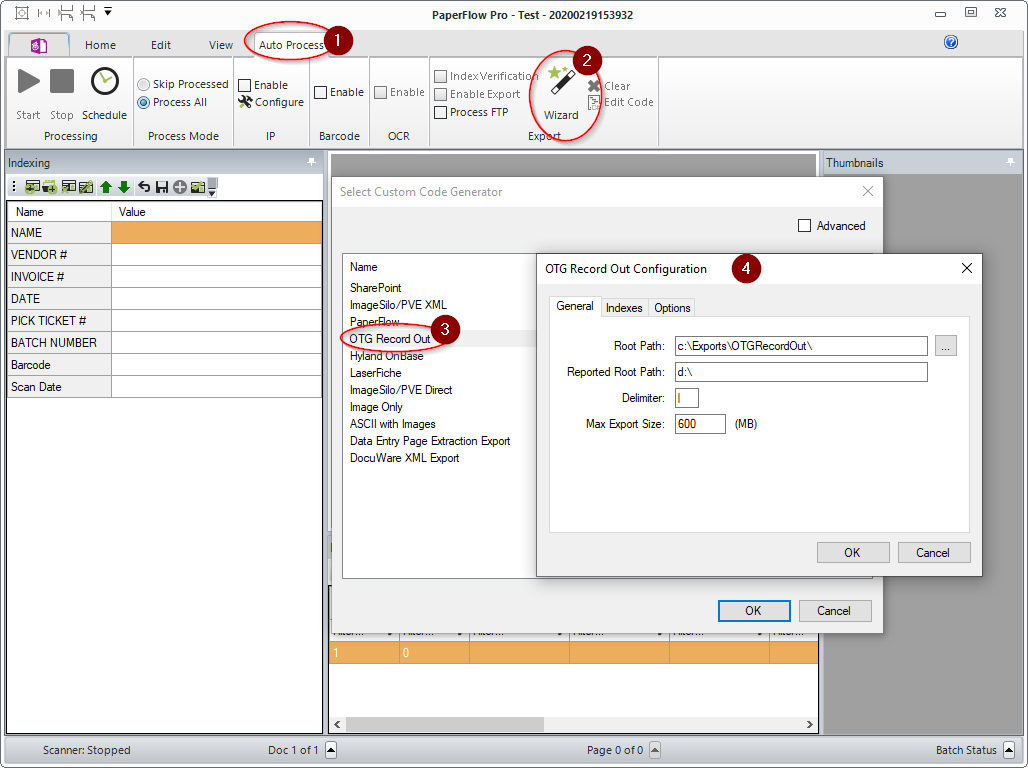
-
- Choose the root path to export the record folder and images to.
- For Reported Root Path, type “.\”.
- This will tell the system to start from the same folder the import file is in, then locate the image.
- Example: .\images\001.tiff would translate to c:\exports\OTGRecordOut\Batch1\images\001.tiff”.
- Leave Delimiter as “|”.
- Leave Max Export size.
Field Setup
Make sure that…
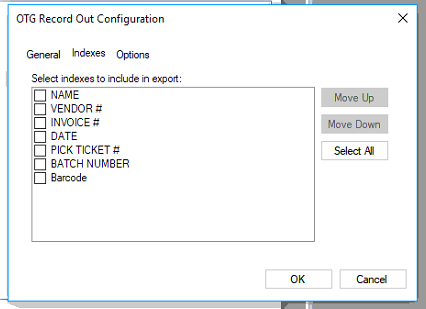
- The field order matches exactly as the Application on AppXtender.
- The fields marked “required” in the application are being provided with data, otherwise the import will fail.

- Check the fields that should be included in the export to AX.
- Make sure that the fields are in the same order as the fields in the Application, otherwise the import will fail.
Additional Options

Additional Notes:
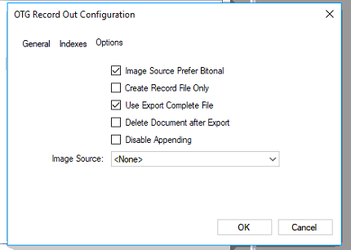
- Image Source Prefer Bitonal: This property is applicable to dual-stream scanners and determines whether to export bitonal or color images. When set to True, which is the default setting, bitonal images will be exported.
- Create Record File Only: If set to True, a RECORD.TXT file will be created, but no images will be created during the export.
- Use Export Complete File: This property, set to True by default, generates an “export.complete” file once an export has reached its maximum file size, so data will no longer be appended to the export. When set to False, the “export.complete” file is not generated, so data may be appended to export folders that have not reached their maximum size.
- Delete Document After Export: This property specifies whether documents are deleted after they have been exported (set to False by default).
- Disable Appending: This property is set to False by default. When set to True, exported images will not be appended to export folders whose maximum file sizes have not been reached.
- Image Source: This property determines whether original images (pre-image processing) or modified images (post-image processing) are used for the export. The Pre-Image Processing option uses the original image that has not been modified by image processing, and the Post-Image Processing option uses the image that has been modified by image processing. The default selection, <None>, uses the most recent image prior to exporting.
ApplicationXtender Import Procedure
To import the indexes, and images for the documents, follow the instructions below.
-
- Open Start Menu and navigate to OpenText folder (or ApplicationXtender Desktop Folder for V7).
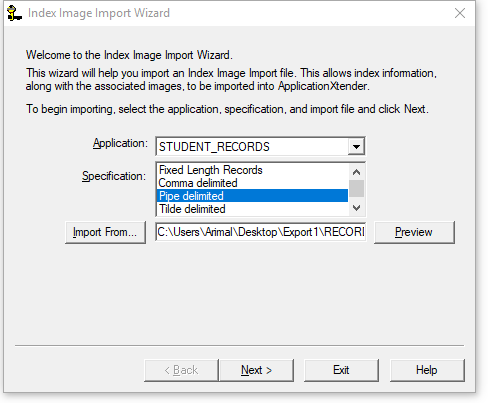
- Open “Index Image Import Wizard”.
- Select datasource and login to an account with index image import rights.
- Select the application to import to.
- Select “Pipe Delimited” for the specification.
- Click “Import From” and select the “RECORD.TXT” file.
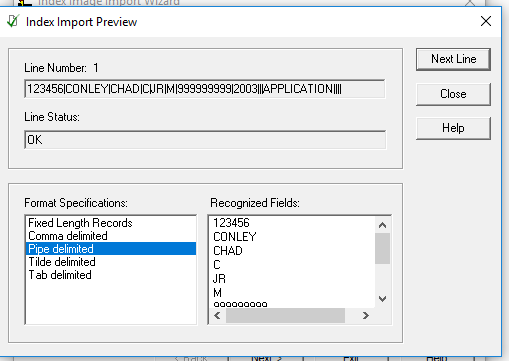
- Click “Preview” button to confirm that the data will import.


- Click “Import” and confirm that all records have been added.


